2013-05-20
Raspberry Pi Printer server for LabelWriter
Update May 2020
@YanickHey has notified me that the Dymo driver does not work we newer versions of CUPS. However, there are workarounds, for example to use an unofficial driver, which fixes the issue here: https://github.com/matthiasbock/dymo-cups-drivers/commit/d780e709c208dcbf2db88577a6d12c00660202b6
Introduction
So I have finally come around and started playing with a Raspberry Pi. If you dont know what it is, its a one card arm mini computer, read more at raspberrypi.org. What i tried to accomplish here was to get the pi to work as remote accessible printer server for a Dymo LabelWriter 450.
The goal was to build a web application that could be used from a tablet and on a click on a button in the webapp ui send a request to the pi with a number of paramterers that would for two labels and be printed. The whole thing used a a checkin system for children whit a label for the child and the parent dropping of the child.
Overview
After some thouhts i desicided to build the system with the following components and parts:
- Dymo LabelWriter 450
- Raspberry Pi, model B with Rasbian Wheezy
- Apache server (with PHP) on the raspberry reciving the printing requests
- C++ application on the raspberry doing the actual printing
Getting the printer up and running
Install cups libraries and other necessary libraries to build
pi@raspberrypi ~ $ sudo apt-get install libcups2-dev libcupsimage2-dev g++ cups cups-clientDownload Dymo SDK and install the drivers
Download the Dymo LabelWriter SDK for Linux located at http://sites.dymo.com/DeveloperProgram/Pages/LW_SDK_Linux.aspx
pi@raspberrypi ~ $ wget http://download.dymo.com/Download%20Drivers/Linux/Download/dymo-cups-drivers-1.4.0.tar.gzNow we need to unpack, configure and install the drivers. This is done with the autoconfigure file that is packed with the sdk. Change directory to the unpacked foleder and run ./configure
pi@raspberrypi ~ $ tar xvf dymo-cups-drivers-1.4.0.tar.gz
pi@raspberrypi ~ $ cd dymo-cups-drivers-1.4.0.5/
pi@raspberrypi ~/dymo-cups-drivers-1.4.0.5 $ sudo ./configure
pi@raspberrypi ~/dymo-cups-drivers-1.4.0.5 $ sudo make
pi@raspberrypi ~/dymo-cups-drivers-1.4.0.5 $ sudo make install
That is everything to get the drivers for the printers installed on the system.
Add the printer
To use the printer, we need to add it in the system first, this is easiest done with cups webadmin. And since the raspberry is only aceessed remote with ssh, we need to install a command line based web browser , I'm using links2. You could use the graphical interface as well. But since the rasperry is going to be a embedded system i'll do everything with command line.
pi@raspberrypi ~ $ sudo apt-get install links2And the we need to add the pi user to the printer admin group to be allow to login to the printer admin.
pi@raspberrypi ~ $ sudo usermod -a -G lpadmin piNavigate to http://localhost:631/admin with links2
pi@raspberrypi ~ $ links2 http://localhost:631/admin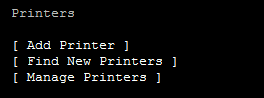
Select "Add printer".
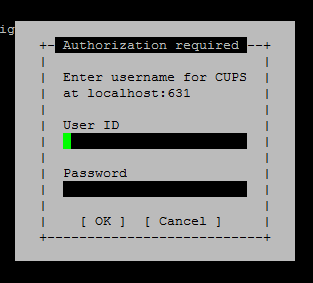
Log in with pi user. Default user pi and password raspberry.
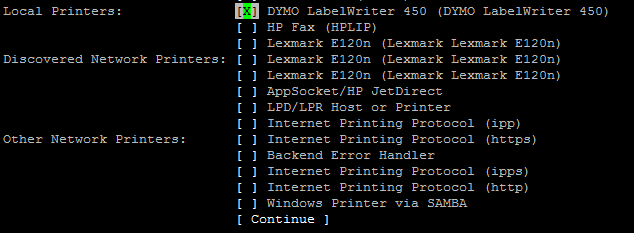
In the list of local printers, the "Dymo LabelWriter 450" should appear, mark and continue.
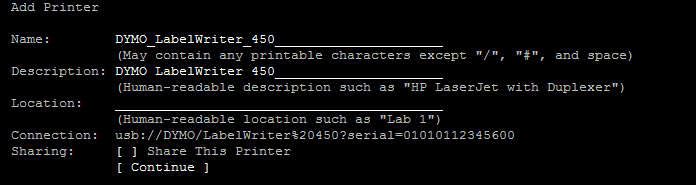
Give printer a name and description, and continue.
Select the Dymo LabelWriter 450 drivers if found. otherwise you need to locate the file that make install created earlier.

That should be everything for the printer. To verify, go the admin interface
and click Manage Printers ant the LabelWriter should appear in the list.
The Code
The printing application
So I built the printing application in c++ from the example code
supplied by DYMO.
The includes used for the application, some standard c++ libraries and
the cups libraries:
#include <iostream>
#include <cups/cups.h>
#include <cups/ppd.h>
#include <string>
#include <stdio.h>
#include <map>
#include <exception>
This code lists all printers and can be useful to see if your program can find the LabelWriter.
int i;
cups_dest_t *dests, *dest;
int num_dests = cupsGetDests(&dests);
for (i = num_dests, dest = dests; i > 0; i --, dest ++)
{
  if (dest->instance)
    printf("%s/%s\n", dest->name, dest->instance);
  else
    puts(dest->name);
}
The actual printing does not require that much code. PrinterName is a string with the name of the LabelWriter you chose when you added it before. ImageName is a string with image to be printed, for me it's a png image that is generated by the web server in the next section.
int num_options = 0;
cups_option_t* options = NULL;

num_options = cupsAddOption("PageSize", "w167h288", num_options, &options);
num_options = cupsAddOption("scaling", "100", num_options, &options);
cupsPrintFile(PrinterName, ImageName, "Print Label", num_options, options);
cupsFreeOptions(num_options, options);
The options for the PageSize parameter can be found in the lw450.ppd file (/dymo-cups-drivers-1.4.0.5/ppd/lw450.ppd). It lists all paper types and sizes available for that printer.
Compiling
For compiling the application these flags is used:
g++ `cups-config --cflags` PrintLabel.cpp `cups-config --libs` -o PrintLabelThe receiving HTTP server
The web server, running apache with PHP, is just used for receiving remote calls with parameters and generate an image and then execute the previous c++ application to print that image.
<?php
$firstname = $_GET['firstname'];
$id = $_GET['id'];
$fileName = "kid_".$id.".png";
//... (image generation with GD and write image to disk) ...
$printOutput = array();
exec("./PrintLabel " . $fileName, $printOutput, $status);
Read something more: Testing Geocoding on Android